Windows 8.1 support ends today. Here’s how to secure your PC

Pour one out for Windows 8.1. After years of living in the shadow of Windows 7, 10, and 11, the day of its death is here. Starting on January 10, Microsoft will end its support, cutting off all future technical, software, and security updates. And to further drive the nail in the coffin, any Microsoft 365 software installed on your PC (like Office or Mail) will also no longer get security updates.
This lack of support makes upgrading to a newer version of Windows a huge priority. In today’s environment, a lack of regular security updates is a disaster waiting to happen. If your computer still runs Windows 8.1, it’s a massive risk now. Fortunately, it’s easy to move on to Windows 10 or 11. And it should be free, thanks to Microsoft’s lax policies around free upgrades. Upgrading to Windows 10 should be a cinch, though Microsoft warns that “Most Windows 8.1 or Windows 8 devices will not meet the hardware requirements for upgrading to Windows 11.” Fortunately, Windows 10 will still be supported until 2025.
To ensure the most hassle-free upgrade experience, you should first prep your PC. Getting all your ducks in a row will make your Windows upgrade smoother, and it doesn’t take that much effort. Here are four suggestions for what you should tackle now—plus one extra that can really save your bacon if things get messy.
Table of Contents
Back up your files

Markus Spiske / Unsplash
Any time you mess with your operating system, be it a refresh, upgrade, or a complete wipe, you should back up your files. You can never predict when things will go sideways.
Fortunately, backing up your files doesn’t take a lot of work, and how you do it is relatively flexible. All you need to do is follow the rule of 3-2-1—three copies of every file (your working copy, plus two additional backups), two different kinds of media, and at least one copy off-site. This guideline isn’t hard and fast, either, particularly for that second rule. It’s fine to use two drives or one drive plus cloud storage. Just make sure at least one of those backups lives in a trusted off-site location in case things go awry while performing heavy OS upgrade surgery on your computer.
Make a copy of your Bitlocker key

PCWorld
If you’ve got a Pro license of Windows 8.1 and have encrypted your PC’s drive(s), be sure you know where your copy of your Bitlocker key lives. And yes, you should have one already—creating a copy of your encryption key should have happened during setup. It’ll be linked to your Microsoft account, saved somewhere as a file, or on a print out. Create a second copy too, for insurance. And if you never made a copy at all? Create two now, with each saved to different media.
Also, a note for just before you upgrade: You may want to suspend Bitlocker (that is, temporarily disable it) before rolling on to Windows 10 or 11. Usually installing a newer version of Windows over Windows 8.1 goes off without a hitch, but some people have run into issues when Bitlocker is active. You can reenable encryption after you’re done. But either way, you should have a backup of your key!
Verify your computer will support Windows 10 or 11

PCWorld
Upgrading to Windows 10 is pretty straightforward—most computers support it, unless you’re running on ancient hardware (i.e., 20+ years old). It may not run well, but the operating system will install and work. But you can verify this by comparing your computer’s specs against Microsoft’s system requirements. To get that info, hit the Windows key + R, then enter msinfo32 to open the System Information app. If your specs meet or exceed Microsoft’s requirements, you’re good to go.
Verifying compatibility with Windows 11 is more complicated, due to its more robust security requirements. Microsoft expects most Windows 8.1 laptops will not be compatible, but if you own a pre-built PC or a laptop, first try checking what your manufacturer says. If that’s a bust or just not an option, you’ll need to compare your PC specs against Windows 11’s system requirements. A little online searching may be in order too, to confirm if your processor (or possibly motherboard, for desktop PCs) supports TPM 2.0—the main barrier to installing Windows 11 on older computers.
A loose guideline is that if your system pre-dates 2014, Windows 11 likely isn’t in the cards for you. (If you have a high-end desktop PC, it could be a possibility, but you’ll have to dig into your motherboard specs to figure it out.) But upgrading to Windows 10 isn’t a hardship. You’re not missing anything in performance, and its user interface is less divisive than Windows 11’s.
Check your apps’ compatibility with Windows 10 or 11

PCWorld
Though many older Windows apps work in Windows 10 or 11, not all do. Take some time now to see if your current apps will behave in newer versions of Windows—check the product pages for the software (and version) you’re running, and look at chatter on forums and Reddit about their experiences moving to Windows 10 or 11. (Just search for the software name, version, and then “windows 10” or “windows 11.”)
If you do discover issues, you’ll be able to download newer drivers or replacement software now, and avoid unexpected (and unwanted) surprises in your daily flow.
Also worth checking: Any peripherals or external hardware you use regularly with your PC. For example, we discovered that an older NAS stopped working with Windows 10, due to the OS automatically disabling older, less file sharing protocols (in this case, SMB v1.0). You may need to figure out workarounds, or in the example here, decide to upgrade to a newer NAS as to not compromise the home’s overall security.

PCWorld
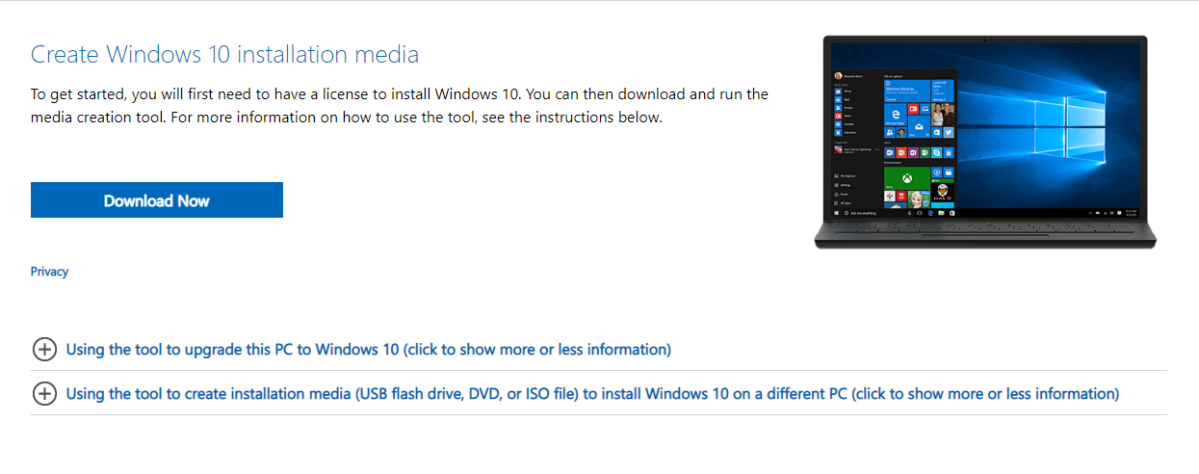
Most people won’t need installation media for their upgrade to Windows 10 or 11, but you’ll appreciate having it in case of emergency. You can more easily troubleshoot major issues, or in worst case scenarios, wipe everything and install a fresh version of Windows.
Creating a USB installation drive for Windows is pretty simple. You just need a USB drive with an 8GB capacity (or larger), and the media creation tool from the Windows 10 or Windows 11 download page. Install the software, plug the drive into your PC, and then follow the on-screen instructions.
If you plan on a free upgrade to Windows 11, make installation media for both operating systems. Since you have to first upgrade to Windows 10 (and get issued an active digital license), you could run into issues with either OS during the Windows 8.1 to Windows 10 conversion or the jump to Windows 11.
Last step: Upgrade to Windows 10
With those crucial steps done, all that’s left to do is upgrade to Windows 10 (and then upgrade to Windows 11, if you’re interested and your PC is compatible). Start the process, kick back, and enjoy those security updates for a few more years.


/cdn.vox-cdn.com/uploads/chorus_asset/file/25547483/SDCCTrailer_FrameGrabs_Galadriel_01.jpg)


